Instructions for the Acro-longe Structure
You want to build a longe. You want to avoid acrobats to hurt themselves when practicing their sport.
We also wouldn't want you or another person to be injured in building this longe.
Because working with heavy loads and at heights adds extra dangers it is important that you read the whole of this manual.
Not only for your own safety, but also for that of others.
It is a prerequisit that you are sober, use your common sense and good coöperation to prepare, build, use and break down this longe.
This guide can help you.
In no way this guide claims any guarantee or to cover all hazards or to be complete. You remain responsible for your own actions and to use your common sense.
You need at least four healthy strong persons to be able to build up the longe.
5 is nice, more than 6 is excess.
This device is not intended for use by persons (including children) with reduced physical, sensory or mental abilities, or persons with insufficient knowledge or experience. These individuals may only use the device under supervision or after instruction concerning use of the appliance by a person responsible for their safety. Supervise.
1. Introduction
This longe stands on a rectangle of ± 12.5 meters x 9 meters and is 6 meters high. The distance between the poles is 4 meters. The stakes are 1 meter long.
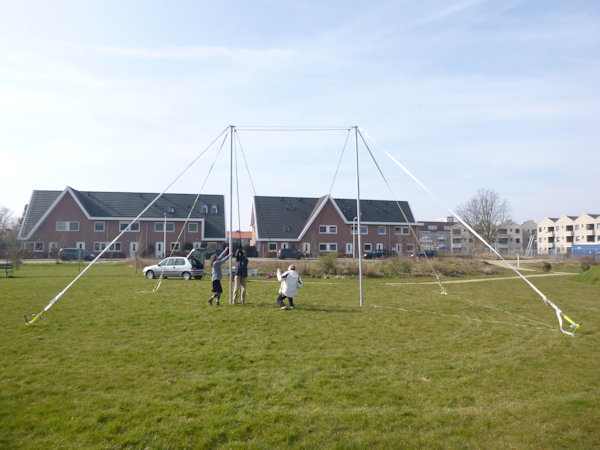
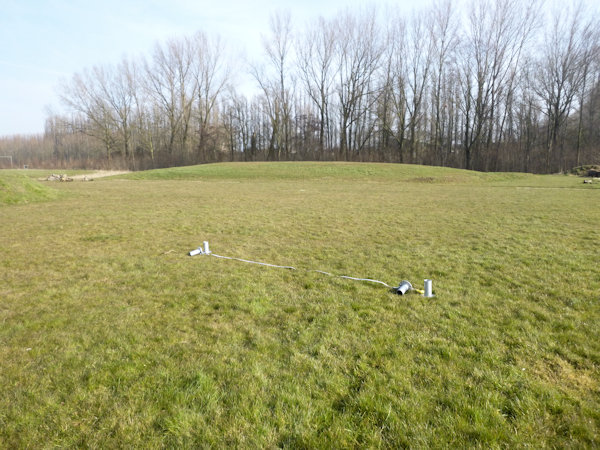
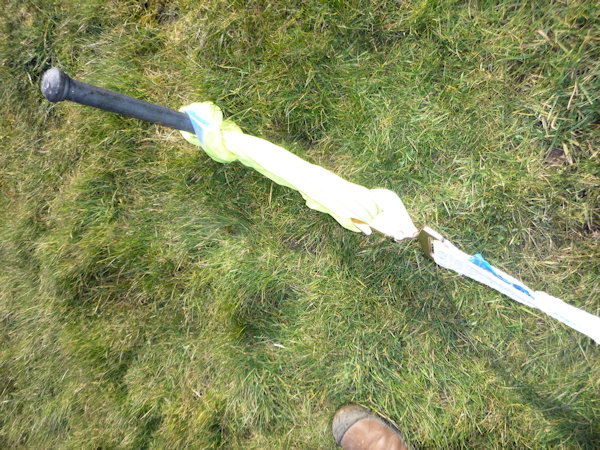
2. longe
Above a picture of the longe as it may be established
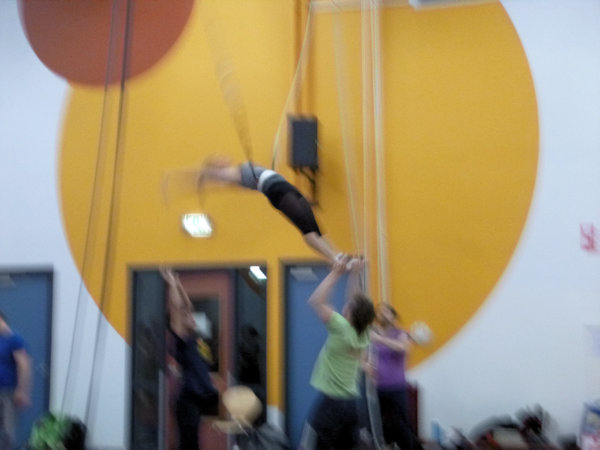
3. What is a longe
This is a contraption for a safety-belt to help acrobats practicing acrobatics. The longe is intended for use outdoors, on grass or sand. The longe is intended for one person. The longe is suitable for acrobatics up to a height where none of the parts of the body stick out over the connecting cable at the top of the masts. The vertical load is calculated and the longe, as a result, is not suitable as a capture aid far beyond the central line. (Directive: no more than a meter). The longe is NOT suitable as a swing.
4. Safety of the longe
It was built on the model of a rig that has been used by professional acrobats for 15 years.
Every effort has been made to fabricate and assemble the lunge from tested and purpose-calculated materials that are certified where possible.
Because this product has no commercial interest, no money has been invested in the inspection of the end product; This would make the whole thing unaffordable.
Safety and reliability have never been lost sight of.
However, the device is loaned to you on the condition that control of the material and use is at your sole responsibility.
The lunge is calculated for 1 average person (of 80 kg) with a safety factor of at least 8x static weight.
In drop tests in a comparable setting (attached to the rings in a gym) with a person weighing 100+kg, a maximum force of 2kN was measured on a single pulley during the fall.
The supplied pulleys are rated at 25kN or more.
The tension straps were all purchased new, 3 tons or more.
All rope (static) and carabiners are of standard climbing quality, minimum 24kN.
The wreath at the top of the pole is 10mm thick and wide where the carabiners are attached.
The poles are only burdoned vertically and are sized to compensate for divisibility.
The straps and loops are of professional quality. Their load capacity is readable on the obligatory attached label.
The acrobat fixed in the lunge must be fitted with a proper belt that is attached to the lunge cord with secure fasteners.
The acrobats and also the spotter must be familiar with or properly instructed in the use of the lunge.
They should not be distracted from their occupation during use.
The device is loaned to you on the condition that control of the material and use is at your own responsibility.
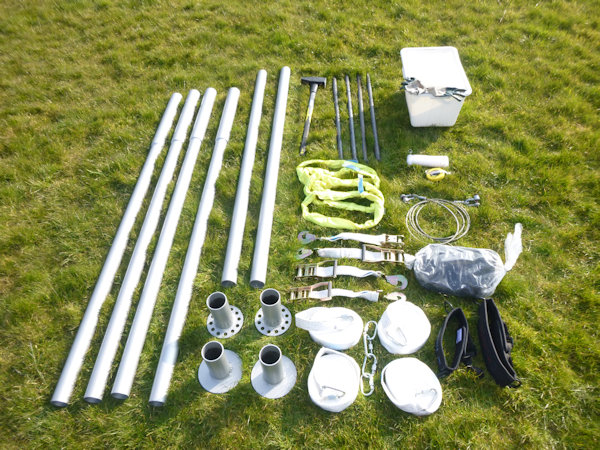
5. How i s the longe constructed
The longe consist essentially of two vertical masts. These masts are connected on top with a steel cable and can be tensioned with four straps. At the top of the masts are fixing eyes for the different bands and cables, but also for the attachment of the actual longe-cord. The longe cord is like it is also used in sportshalls and gymnasiums. To make transportation possible and simplify building the masts are made dividable.
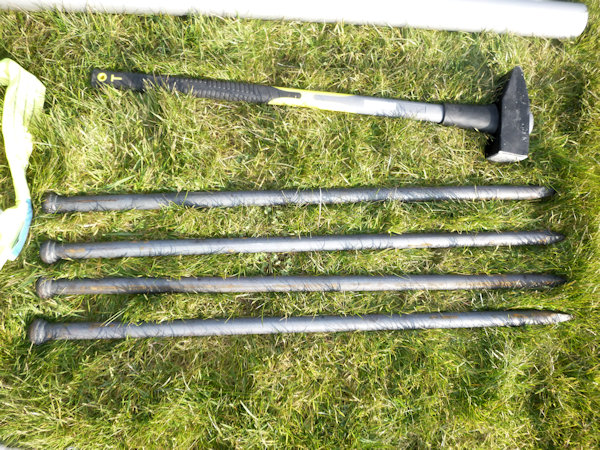
6. The pegs
The pegs are beaten into the ground for at least two thirds
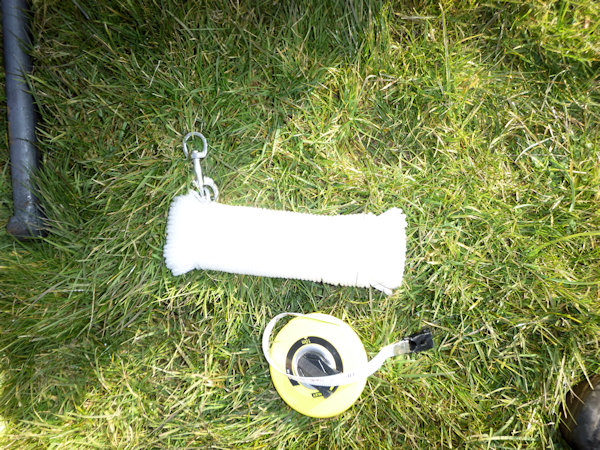
7. Tape
The tape measure or nylon rope is used for plotting the ground plan
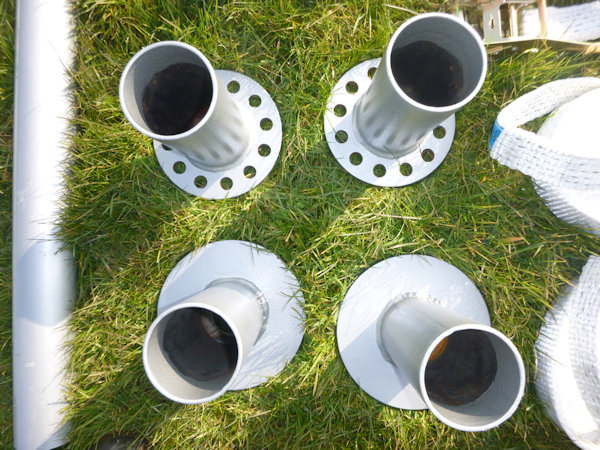
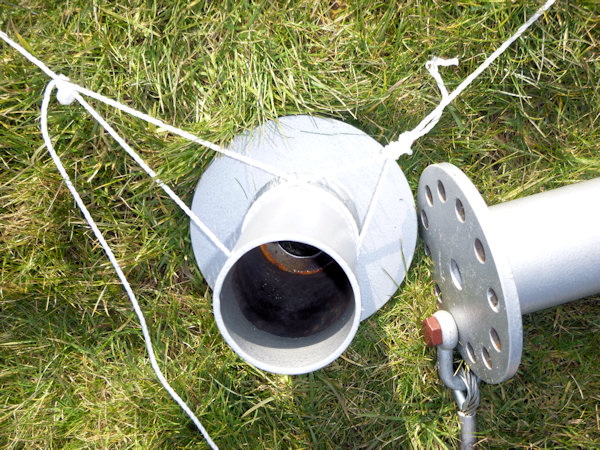
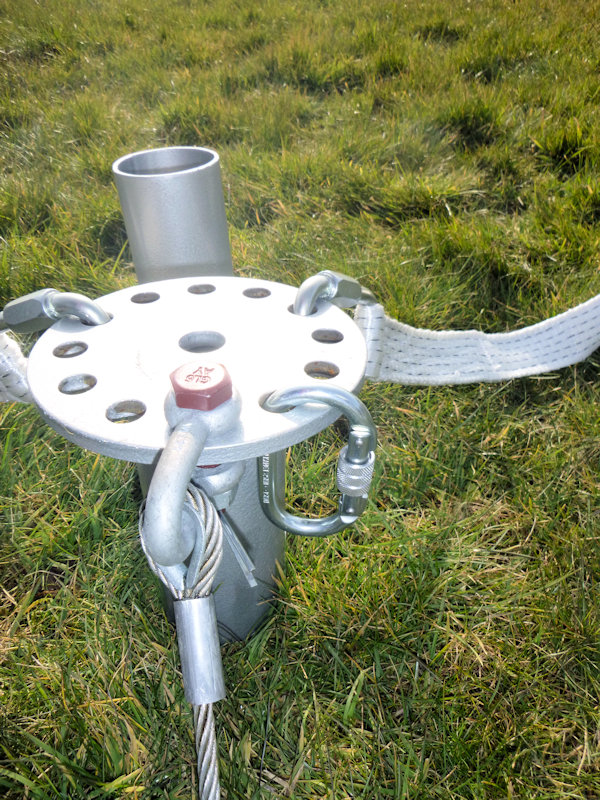
8. The Jars
The bottom and top of the mast. The pots with the holes go to the top.
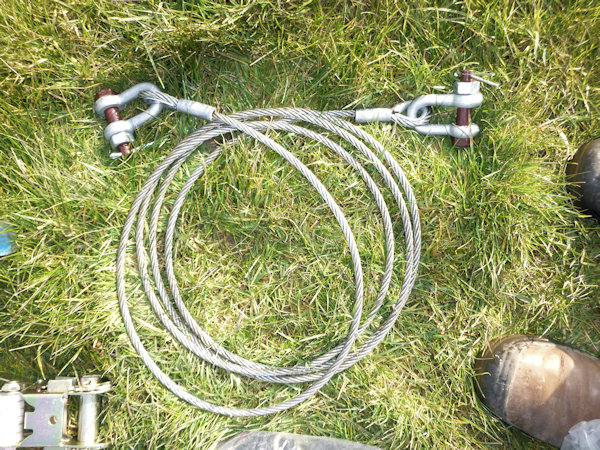
9. The steel cable
The steel cable connecting the two masts at the top.
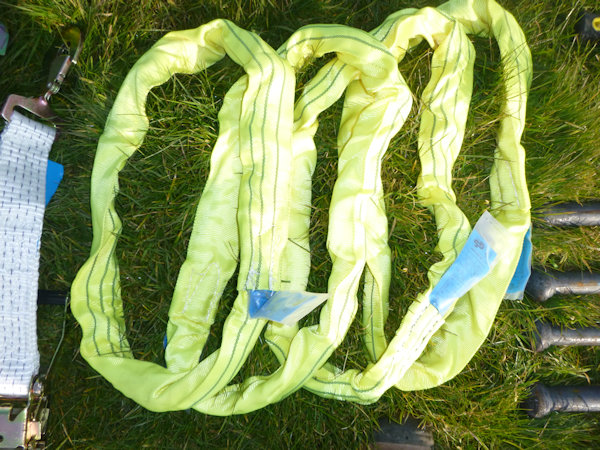
10. The Sling
The slings are looped around the pegs to create a good hookpoint for the strap ratchet.
11. Lashing
The straps tighten down the towers at the four corners of the longe. They are connected with the top pots and the slings to the pegs.
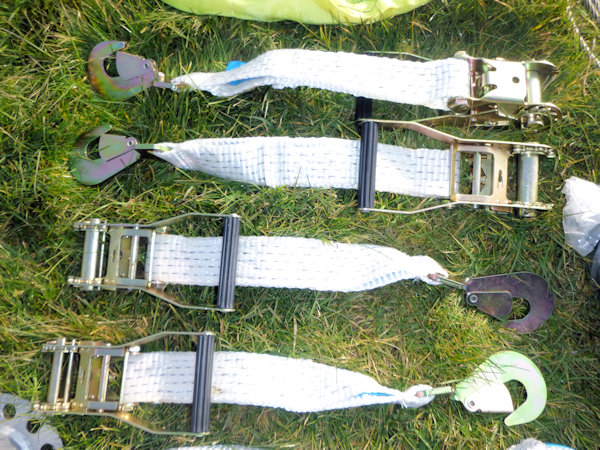
12. The ratchet
Span Ratchets form the underside of the strap to be attached to the slings to the pegs. The strap is then rolled up and put tight.
13. Preperation
Use gloves and sturdy footwear. Assure yourself that there is enough space (12.5 x 9 meters and a height of 6 meters at least). The surface should be flat. There should be no electricity wires hanging or lying around this mainly metal object because of danger of electrocution. They would possibly make contact. Also, determine if you can beat the stakes into the ground without touching located tubes, pipes or other objects. Also takes into account the position of the sun to avoid the acrobats the catcher to be blinded. If all the Premises are reviewed and the material is unloaded and neatly laid down, it is time to measure.
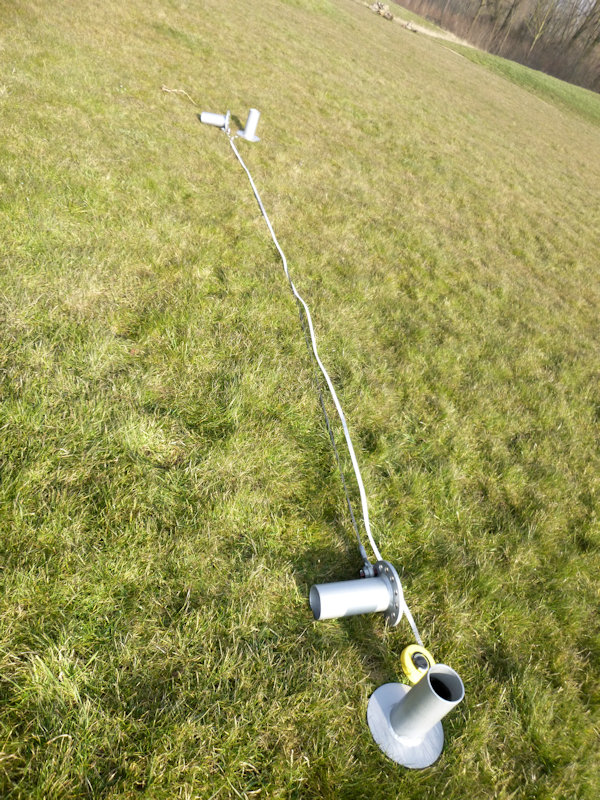
14. Measurement
It is important to measure the distances in advance. The center to center distance of the top pots (with the steel cable) is 420cm. Lay the cable with the two top-pots on the ground. This measures your distance off the ground pots, which can already be put where the longe should be placed. Mark these ground pots with the spray paint by putting a circle around it. So you can put them back in the right place if necessary. The imaginary line through the two soil pots is called the main line.
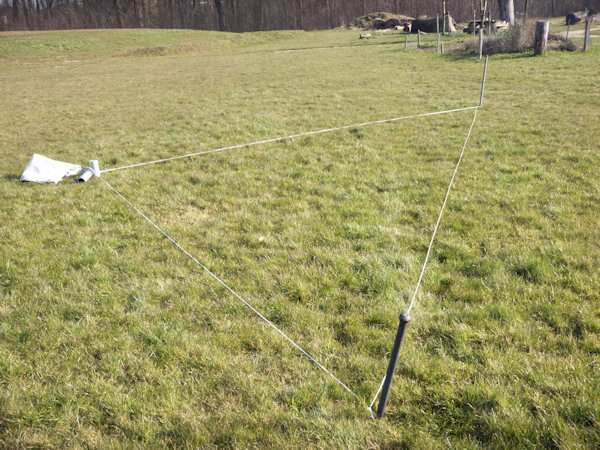
15. Create a triangle
Take the nylon cord marked 'triangle' and use it to create a triangle with legs of 6 meters from the pegs to the grondpot. Between the pegs the distance is 9 meters.

16. Place the pegs
Ensure that the 9 meter line is perpendicular to the main line. Place two pegs on the corners.
17. Make a triangle 2
Repeat this on the other side of the main line.

18. Place the pegs
Beat the pegs in with the big hammer, in the direction of the bottom pot, at an angle of 45° to a depth where they still protrude 30cm.
19. The Sling en the Ratchet
Apply the sling with a loop around the peg. The bright color of the sling reduces the chance that someone walks into it. Hook the short end of the strap, the ratchet in the sling and make sure locking flap closes properly.
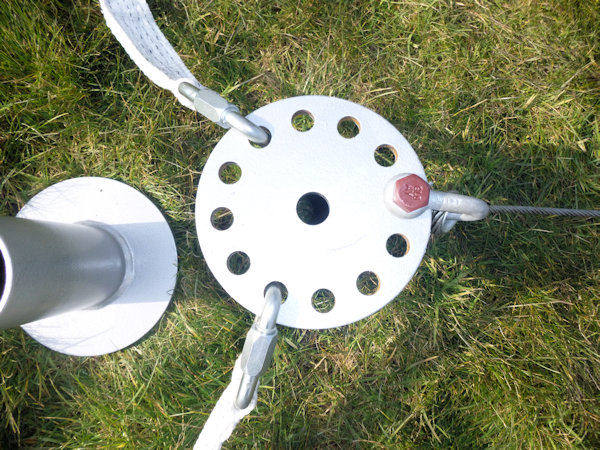
20. The Lashing
Hook the straps with the large triangle closures to the top pot. Tighten the locknuts. There are three free holes between each carabiner. Lay the strap in the direction of the associated peg.
21. Attaching the longe-cord 1
Hook the carabiner where the pulley comes next to the shackle of the cable.
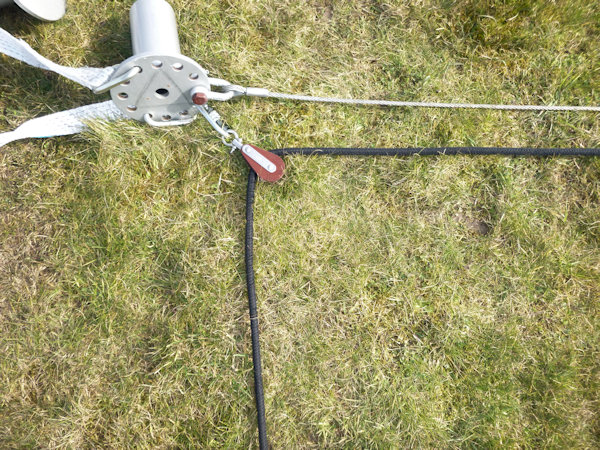
22. Attaching the longe-cord 2
Now hook in the pulleys. Tighten the locknuts. Place the longe-cord neatly on the ground with the belt hooks and the end of the cord (the catchers side) to the same length.

23. Attaching the longe-cord 3
Hook the belt hooks and cord end together with the sand bag to prevent the longe from sliding out of reach once set up.
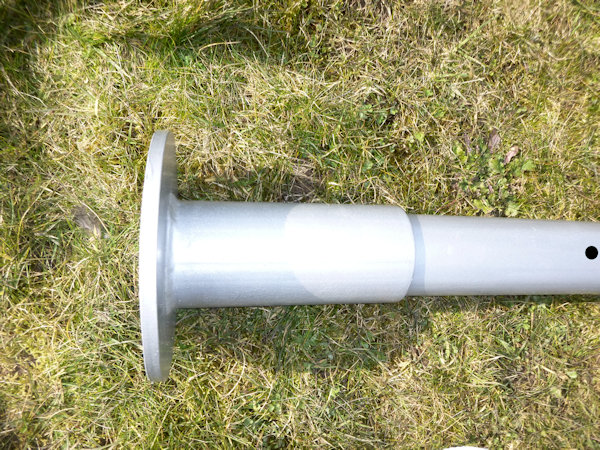
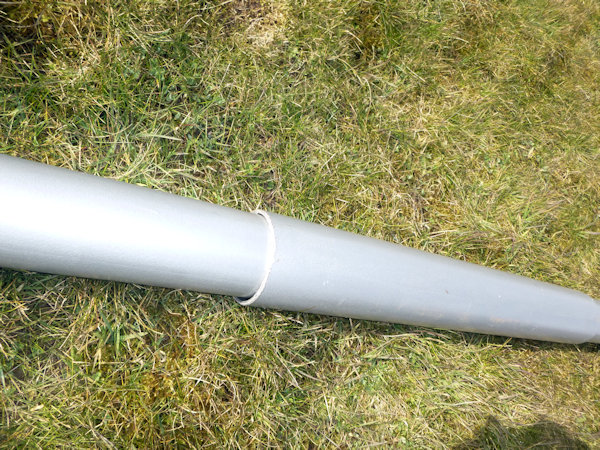
24. Insert the portions of the first mast together.
The short part is the lower part. The holes in the mast are intended to be at the bottom to later use the lifting-iron.
25. Setting up and tensioning of the longe
Put the first mast flat on the ground, the lower pot in place. The top-pot in the direction of the main line to the outside. This means that the top-pots with all attached securing straps and cords scroll off center. The second mast remains in parts close to the main line.
26. The Ratchet
Before we go straightening the mast we will first explane the use of the ratchet. Watch the video (2:30min.). The longe straps are not put to full tension, but simply put tight lightly. Too much tension on the strap gives extra load on the poles and the steel cable and is therefore unnecessary. Takes into account the fact that the ratchet clamps well only when the strap is rotated at least 3 times around the axis. So if you wind it up too short the strap may slip. The strap can not be rolled up to much either, because the role will become too thick on the ratchet. Tensioning of the four ratchet straps should therefore be done with two people. One that keeps the strap tight and one which operated the ratchet. Unwinding and rattling up again may require some practice.
27. Erecting the lunge with the top beam
Ask for the accompaniment and instruction in the rental form!
Without experience this can be a dangerous activity, so don't skimp on preparation; have all involved read this instruction manual.
In this case the ground pots with hinges are used for the first portal. The crossbar is placed at the top instead of the cable or strap. This is placed flat on the floor the way it should be when erect. For the preparations, see point 28 (below). The tension straps on one side are already attached to the pegs with about half to one meter extra length. Then the laying portal is pulled up with at least 6 people. Preferably two people who lift the crossbar and then walk forward via the poles while pushing them upright. Meanwhile at least 3 people per side pull the straps of the respective tops of the poles to pull the portal upright. The portal will then tilt slightly to the side where the tension straps are still loose so that they can now be inserted without tension at the ratchets at the pegs. This is followed by the positioning and tensioning of the protal.
With the triple lunge, the other two posts can then be placed in a triangle using the insertion method as described above.
When the whole is in place, two pegs with tension straps on one side of the first portal have become superfluous, temporarily. These may be released and the straps be wrapped around the central post. Leave the two pegs in place if possible, because they are needed again for tearing down, leave them marked.
28. Triple-Lunge Preparation
Before the first portal is erected:
Attach all pulleys and straps to the masts, in this order:
- 1) The straps of the temporary pegs. (The pegs that are removed when the two extra posts are secure.)
- 2) The rope ladder
- 3) The single pulleys for the lunges. (the doubles will be hanging on the outer side where the spotter will be) The ropes need to be inserted and the double pulleys will be together with the outer top on the other side.
- 4) The large gray lifting straps for the cross connection. Connect the lifting strap to the tops where the outer pulleys are attached. watch out for twists.
- 5) Hang sandbags or other weights on the parts of the rope that should be left hanging low.
29. Hoisting and tensioning the first mast
Two persons take the end of the tensioning strap in their hand, and stand at the respective tent poles. No3 takes the remaining straps in his hand on the side where the loose top-pot is. The 4th person lifts the mast on the top pot and pushes it overhead. Thus No4 is pushing up the mast towards the 3rd person. No3 pulls and hangs with his weight at the two tensioning straps and thus brings the mast to a vertical position. The No1 and No2 keep tension on the strap but let it easy off slowly while the mast erects. They contribute to care to keep the pole in balance. If the mast is almost vertical No4 (or 5) helps the No1 and 2 to put the strap into the tape slot and secure it provisionally. If the mast leans over slightly towards No3 he doesn't have to keep pulling it out as hard while No1 and No2 walk around to pick up the two straps at the other side by the respective pegs. No3 gives both ends of the straps to No1 and No2 and No4 can then help No3 with the insertion of the second mast.
30. The hoisting of the second mast
While No1 and No2 hold the straps taut No3 and No4 together put the upper part in the top-pot that now hangs about 2 meters high, after which they address the middle part and after that push in the lower and short section. In the lower section at the bottom are two holes where you can put the lifting-rod through. The rod is temporary and facilitates the lifting of the second mast. No1 and No2 hold the mast in balance while No3 No4 and push it up so it can be put in the lower pot. If that is done No3 and No4 put the ends of the straps into the tape slot and put on preliminary tension. If all went well the frame is now stable, except from some alignment.
31. The whole story again.
The two-part film, but in one.
32. Tensioning and alignment
Both lower pots are now in place and the masts about vertical. This should of course be truly vertical. Two people can now view the side and tell how the straps should be adjusted. The other two will make one or more rounds along the ratchets to tighten down the whole longe. PAY ATTENTION! The straps should not be pulled too tight to avoid unnecessary force on the contraption. The straps may be slightly tight, but do not have to be tense. All that tension must be absorbed by the cable on top of the masts. In an exaggerated case that tension may be higher than the certified value of the steel cable. Thus, it will usually be necessary to fully unroll the ratchets and/or re-tighten them. If the poles are vertical, the ratchets can be put into their stop position and the longe is ready. It is not allowed to charge the straps sideways by pulling or hanging on, making somersaults or the like, because such a triangle load force strains the upper cable undesirable.
33. Use of the longe
Ask for a workshop lunging or a companion in the rental form.
34. Common mistakes
Checking the closures, Standing straight underneat the mast. Not moving along. Sliding the ropes. The height of holding the ropes. Rope on the floor that is in the way. Lunging to short, lunging to long. Not paying attention. Not being ready and a lack of communication are some of the many made mistakes. Ask for a workshop lunging or a companion in the rental form!
35. Breaking it down
In breaking down the longe care must be taken that there is no one in the rectangle surrounding of the longe. Hook the sandbag to the belt hooks and the end of the cord-longe. The idea is to loosen the ratchets on the front side (parallel to the main line) by two people per ratchet (different from the video). Thereafter, the masts can be lowered in their entire length into the opposite direction. Eventually they will fall with a thud, but try to avoid falling as much as possible. It is possible that the poles fall on the carabiners with the top. Which should therefore be checked for damage before they are packed. On some soils, it is also possible that the masts start sliding at the lower pots; i.e., that the soil-pot becomes detached in the direction of the people at the straps. Therefore use an extra strap with a peg to fixate the bottom pots.
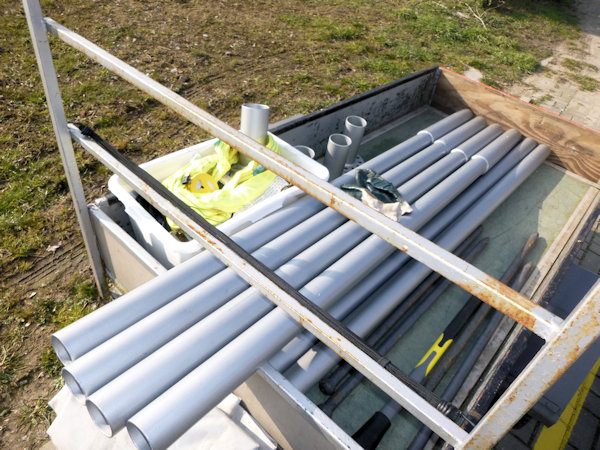
36. Clearing up
The pegs are best released by hammering sideways against the peg until there is room in the ground to pull them out. After drying the material, remove all dirt and store the parts like you've received them. Also see the pictures at the top. The top-pots and the steel cable may remain together. The longe-cord and pulleys too can be stored as a whole. Report any defects, missing or damaged part before returning the longe. Unreported damage is always deducted from the deposit. Thanks in advance for your cooperation.